Children’s Corner
When scissors are introduced into a child’s world for the first time, all sorts of mayhem can ensue, but what could be better than putting their skills to good use and recreating one of nature’s most-loved reptiles?
Turtles and tortoises comes in all sorts of shapes, sizes and colours; certain species can live for 100 years.
While making your paper plate turtle, which involves lots of cutting, pasting, painting, and creativity, you can learn more about these long-necked, slow-moving creatures.
Supplies needed:
-Paper plate – any size
-Construction paper
-Kid’s scissors
-Glue
-Sequins
-Googly eyes
Instructions:
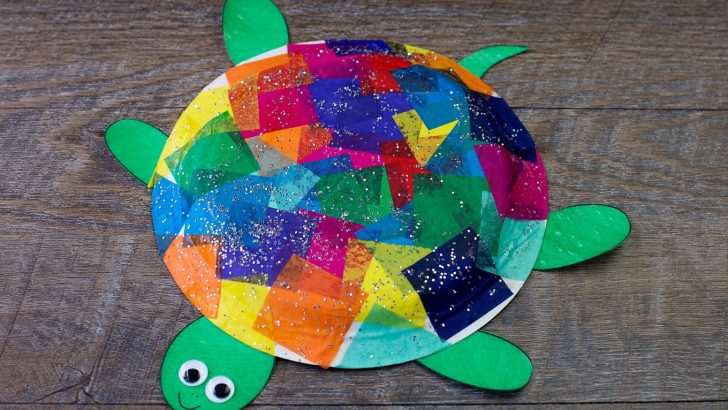
Have your child cut strips of construction paper. Then they can cut those into smaller pieces, which can be squares or rectangles.
Glue the pieces to the back side of a paper plate. A dessert-sized plate that has a rim around it may be better than the thinner kind which don’t have a defined rim – this gives your turtle more volume. You can also make parent and children turtles.
To make the large parent turtle, use a regular, full size paper plate. If you only have larger paper plates you can make a smaller turtle by cutting the centre out of a regular size paper plate. Use the centre, smaller circle for your child turtle.
You can also decorate the turtle shell with a marker – no need to stick to one colour – rather than using a scissors to chop coloured paper.
Cut out a head, four legs and a tail with scissors and green construction paper. Glue them onto the underside of the shell.
Then you can glue sequins around the edge which come in different sizes and can be purchased in many shops.
Finally you can add googly eyes to the turtle’s head for the finishing touches.
It’s not only turtles you can create, with a little imagination and a few easy to find arts and crafts gear, the family can set about making a huge range of little critters.
Perhaps a paper plate fish, cat, turkey, peacock or even an octopus?


 Chai Brady
 paper plate turtle