Sweet Treats
Laura Anderson
This indulgent no-bake cheesecake is ideal for treating your special someone this coming Valentine’s Day. Although the method is lengthy, it is simple and no baking means there’s no chance you can burn it! Don’t be tempted to add any extra ingredients to the filling though, as this could prevent the cheesecake from setting properly.
Ingredients
For the base:
-250g digestive biscuits
-100g butter, melted.
For the filling:
-580g full-fat cream cheese
-100g icing sugar
-2 tsps vanilla extract
-250ml double cream.
For the strawberry sauce:
-140g strawberries, hulled
-3 tbsps maple syrup
-200g extra strawberries for decoration.
Method
Grease and line a 20cm loose bottomed tin with baking paper.
For the base, put the biscuits into a ziplock bag and using a rolling pin crush them to a fine crumb consistency. Then in a bowl, mix together the crumbs with the melted butter until they are evenly coated. Press this mixture firmly into the bottom of your tin to create an even base. Leave this to set for one hour in the fridge.
Beat together the cream cheese, icing sugar and vanilla extract for the filling with an electric mixer until smooth (a good tip is to make sure the cheese is at room temperature; it will help the cake to set). Add the double cream and continue to beat until an even, thick consistency is reached.
To make the sauce for the swirls, blend the strawberries and maple syrup until smooth. Using a small saucepan bring this mixture to the boil then allow to simmer for about five minutes until it thickens. Leave this to cool slightly as you prepare the filling. Line the outside of the tin with a ring of sliced strawberries. Then, starting from the outside and working your way in, spoon in the cheesecake filling, ensuring that there are no air bubbles. Use a spatula or the back of a spoon to make a smooth, even top.
Syrup
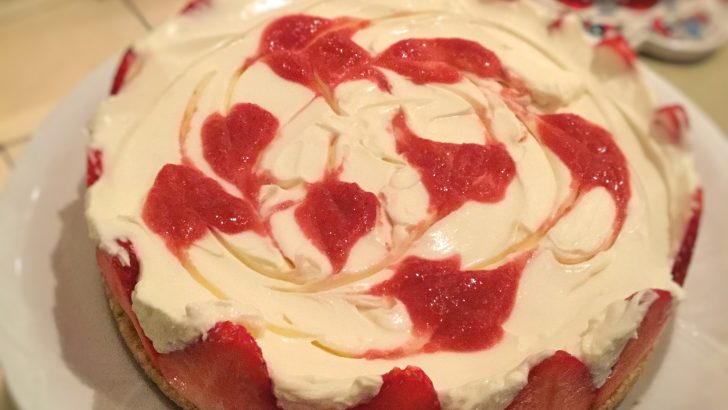
To achieve the swirls on top of the cake, dollop teaspoons of the strawberry syrup across the surface. Then, using a thin knife or a skewer, start from a dollop of syrup and drag it across the top of the cheesecake to create a swirl. Clean your skewer between swirls. You can make it as bold or as feathery as you like. Once you’re finished designing, it’s time to pop the cheesecake into the fridge overnight to set.
The following day to successfully remove your cheesecake from the tin set it on top of a tin can, open the side of the tin and pull it downwards slowly. Then gently work a pallet knife under the base to slide the cake onto the serving plate. Serve with some more fresh strawberries!


 Strawberry Swirl Cheesecake